Autolayout vs Autoresizing Masks in Swift
Learn when to use autolayout and autoresizing masks to create responsive user interfaces in Swift.


User Interface layout programming is a big part of modern iOS and macOS apps written in Swift. This post presents a brief overview of two layout methods, Autolayout and Autoresizing Masks, and contains examples of how each method can be used in Swift:
- Autolayout
a. What is Autolayout?
b. Autolayout Example
c. Autolayout Safe Areas Example - Autoresizing Mask
a. What is a Autoresizing Mask
b. Autoresizing Mask Example - Autolayout vs AutoResizingMask
a. When To Use Autolayout
b. When To Use Autoresizing Masks - Using Autolayout And Autoresizing Masks At The Same Time
Autolayout
What is Autolayout?
Autolayout is a user interface layout framework that uses constraints, a rule for where a UI element should be, to determine the layout of a UI. The autolayout engine will recompute the appropriate layout when the superview changes size, for example:
- The user resizes a window on macOS
- An iOS device rotates
- The user enters or leaves split view on an iPad (running iOS)
Autolayout Example
One common use case for Autolayout is supporting rotation so a UI adapts appropriately to landscape and portrait device orientations.
To use Autolayout on a view, that view needs a complete set of constraints. This means the view’s x, y, width, and height properties must have constraints defining how each of those frame properties should be computed.
Here, to make a UILabel and UITextField responsive, the following constraints will be added:
- Top Space to Superview (40)
- Leading Space to Superview (20)
- Trailing Space to Superview (20)
- Bottom Space to Superview (8)
- Height (25)
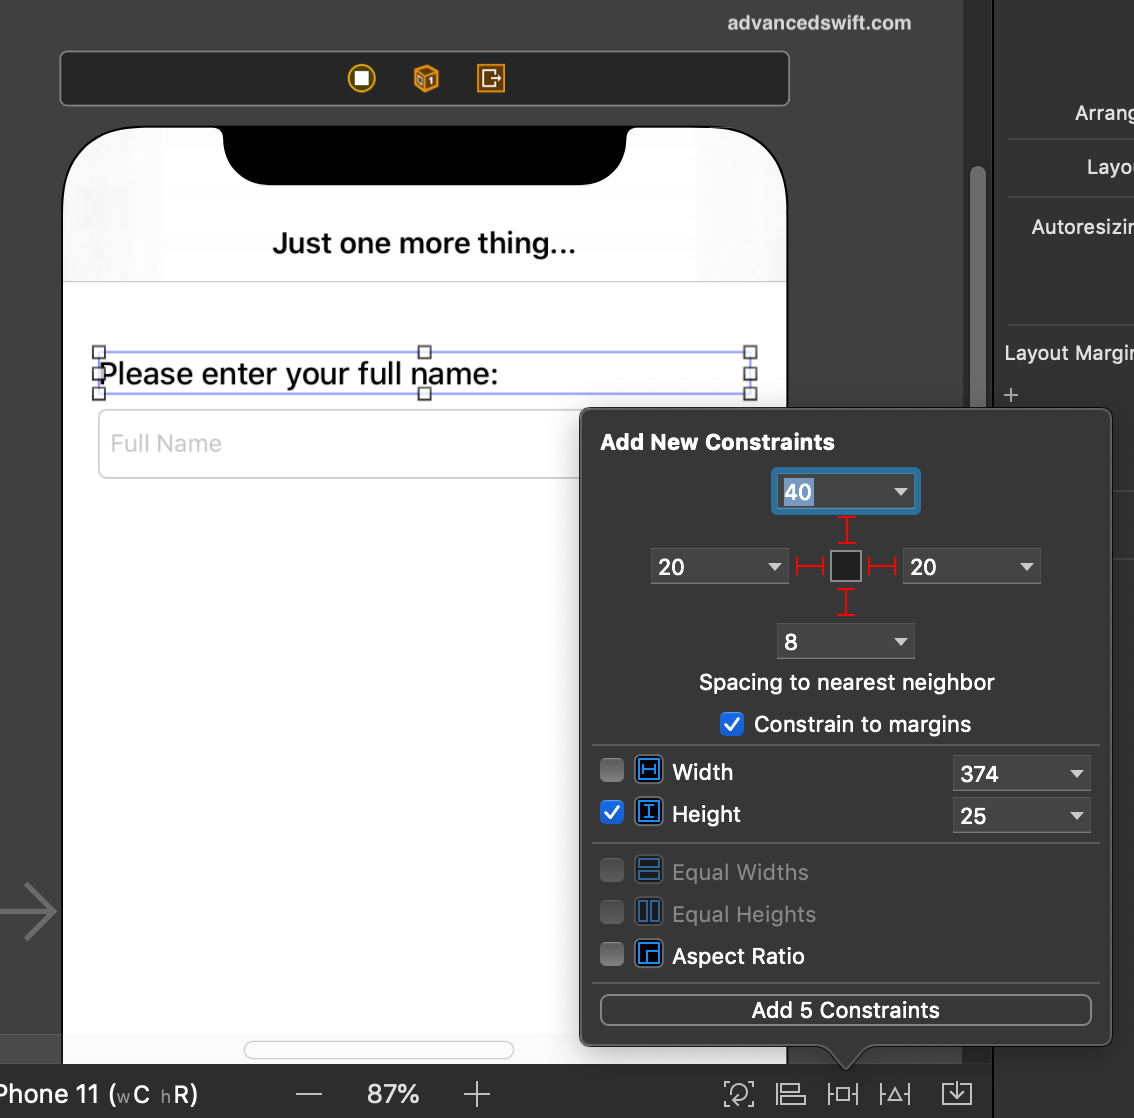
Adding the constraints in a Storyboard to the UILabel shows the blue constraints attributes when the UILabel is selected. The same type of constraints were added to the UITextField underneath.
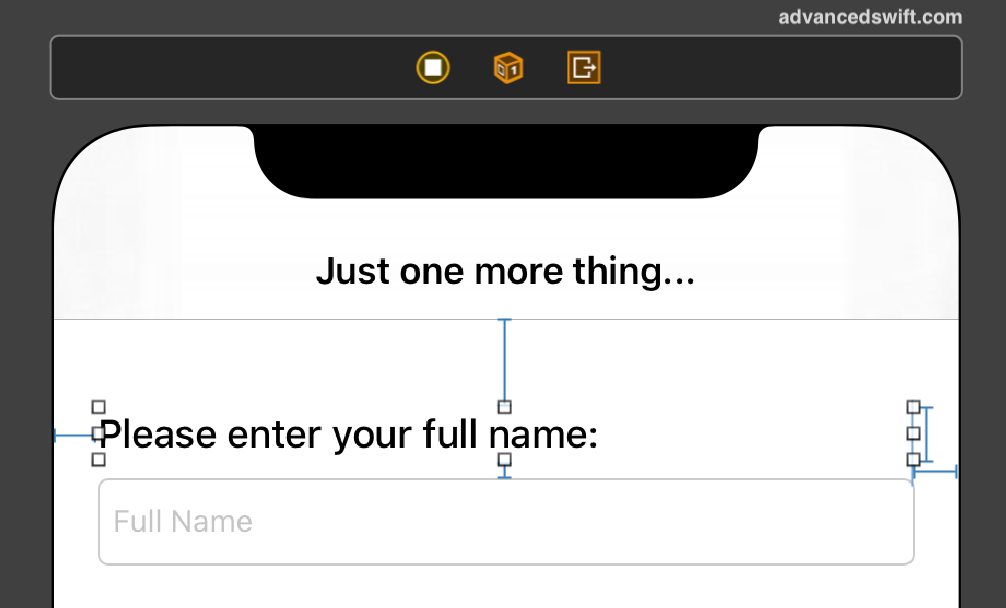
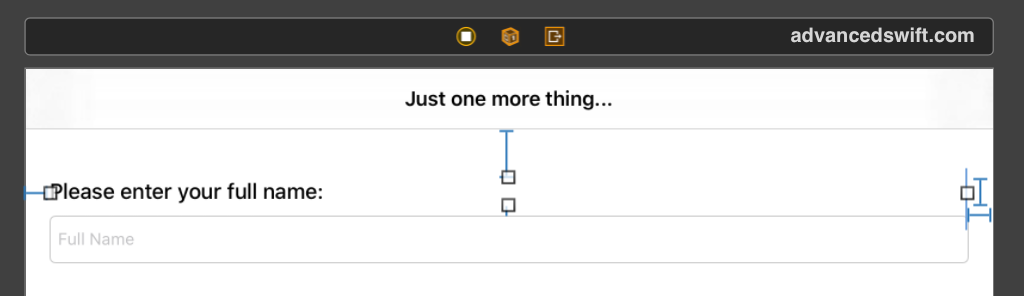
The UILabel and UITextfield are now properly constrained using Autolayout. When the UI orientation is changed to landscape, Autolayout will expand both views horizontally.
Autolayout Safe Areas Example
A superpower of Autolayout is handling safe areas. Safe areas are margins maintained by the iOS system to help user interfaces account for system attributes. For example, safe areas can be used to handle rounded corners and non-rounded corners on iOS screens.
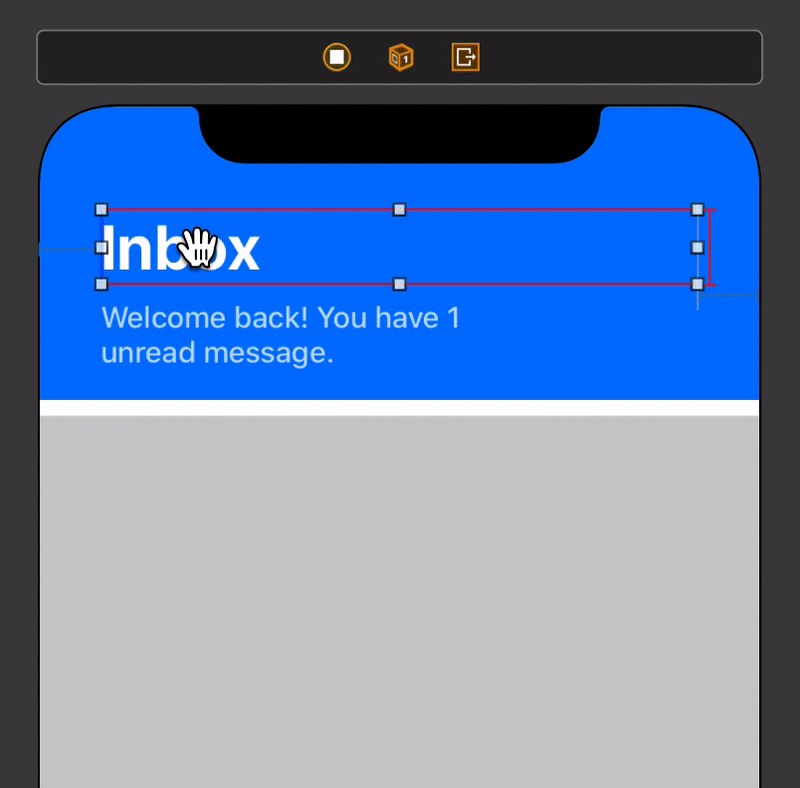
The secret to handling safe areas is a view constrained by autolayout does not need to be constrained only to its superview. In the following example, the Inbox UILabel will be constrained to the top safe area of the UIViewController view even though the superview of Inbox UILabel is the view with a blue background.
The first step is to constrain a view with a blue background to the leading, top, and trailing edges of the superview (here a UIViewController view).
Importantly, do not constraint the bottom or the height of in this step.

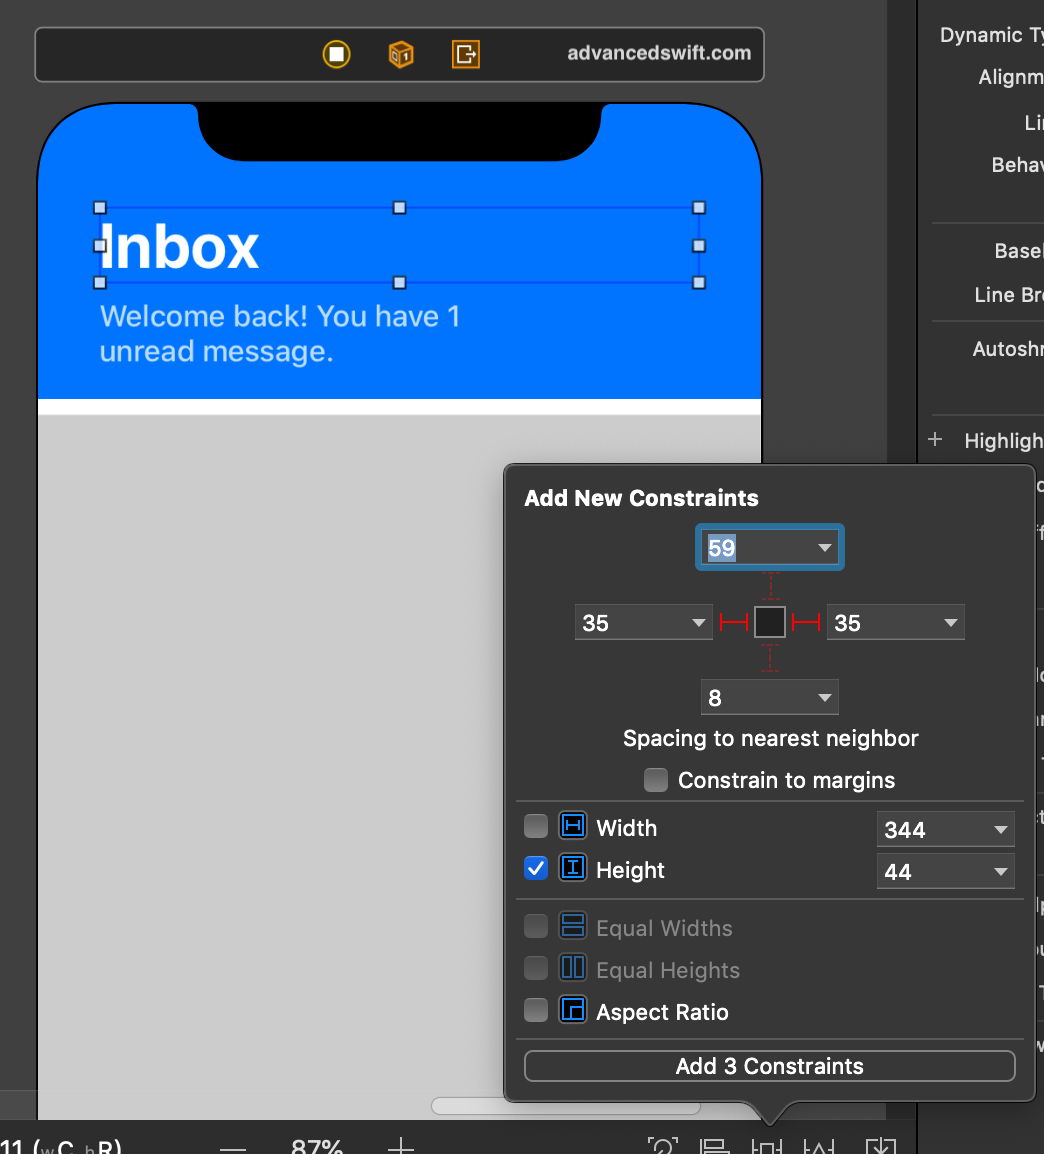
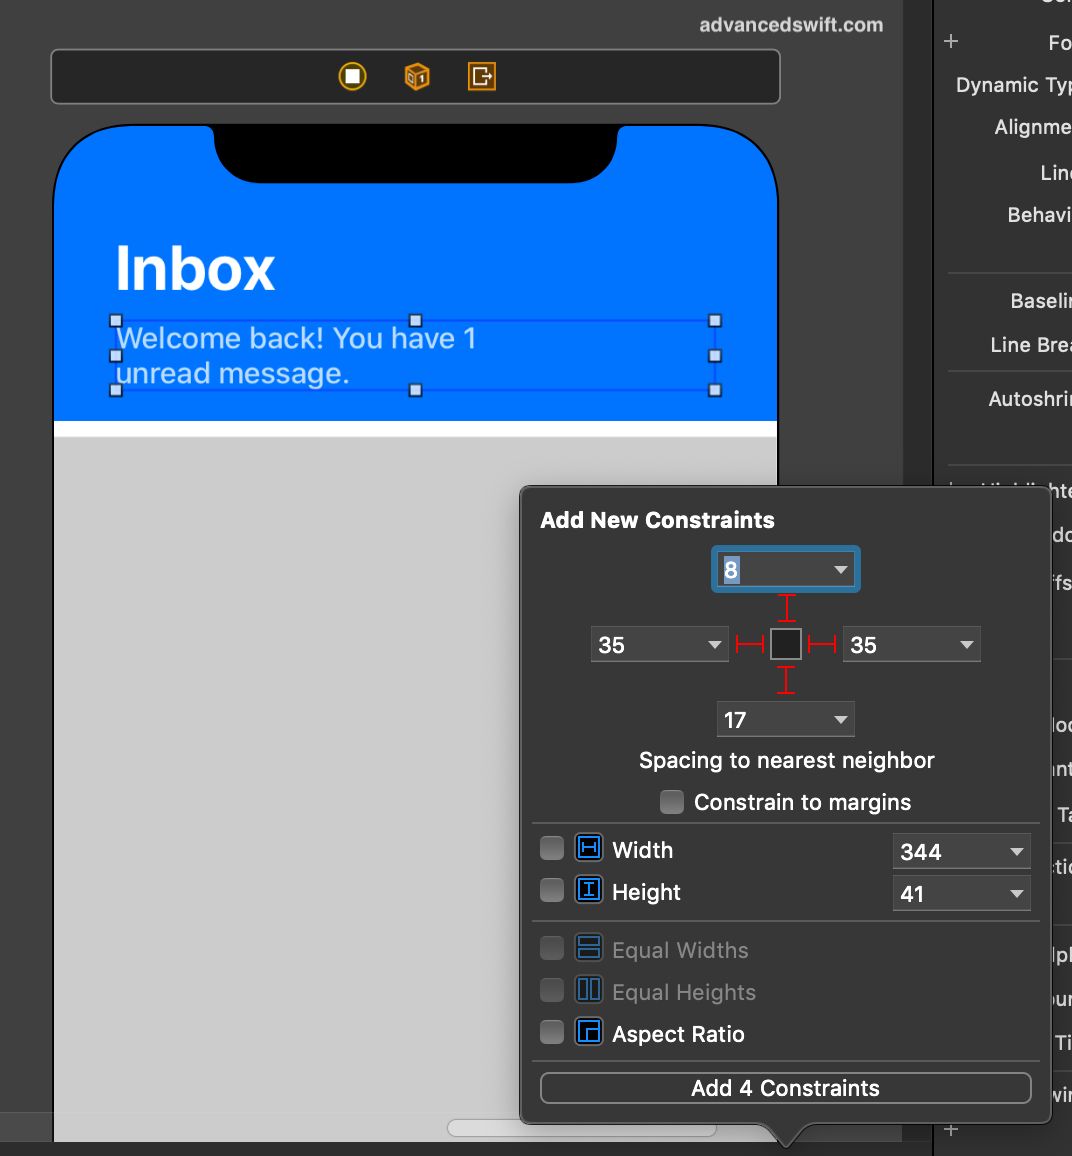
Next, add two UILabel labels with some text. Add constraints for the leading and trailing edges of the Inbox UILabel to the superview (view with a blue background). Also add a height constraint to the Inbox UILabel view.
Importantly, do not constrain the top edge of the Inbox UILabel at this step.
For the subtitle UILabel, add constraints for all edges to the superview.
So far, the views added are not yet fully constrained. This next step completes the Autolayout configuration and provides desired behavior.
Constrain the Inbox UILabel to the Top Safe Area of the UIViewController view.
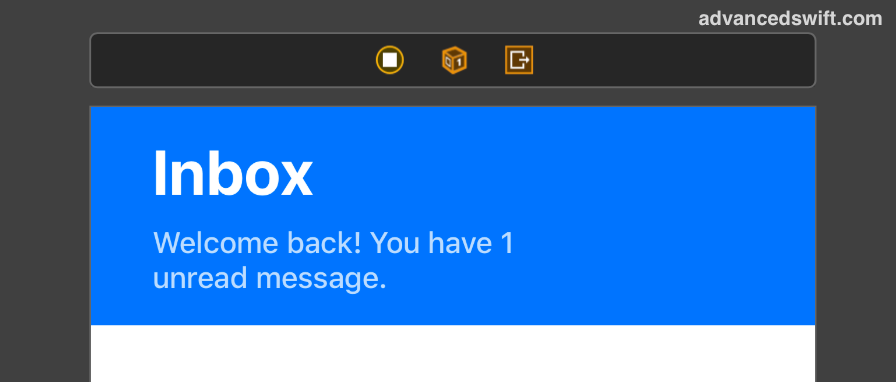
The result shows the powerful capabilities of Autolayout. Now across different devices with and without rounded corners, the defined UI will display correctly:

Autoresizing Mask
What is a Autoresizing Mask
Autoresizing masks is a layout method using a bit mask, or an encoded set of flags, that defines how a view should respond to changes in the superview’s bounds.
The properties available in a autoresizing mask on a view are:
- Flexible Top Margin, meaning resizing can change the view’s top margin
- Flexible Left Margin, meaning resizing can change the view’s left margin
- Flexible Right Margin, meaning resizing can change the view’s right margin
- Flexible Bottom Margin, meaning resizing can change the view’s bottom margin
- Flexible Width, meaning resizing can change the view’s width
- Flexible Height, meaning resizing can change the view’s height
Autoresizing Mask Example
This autoresizing mask example will define the layout of all subviews in a chat message cell using autoresizing masks. First, add all the views (4 UILabel labels) in the view without any constraints.
Then, in the Size Inspector, configure each view with the appropriate resizing mark. Each red and faded red arrow or strut in the Autoresizing section of the inspector is clickable. Clicking on a red or faded red component will enable or disable the autoresizing mask property.
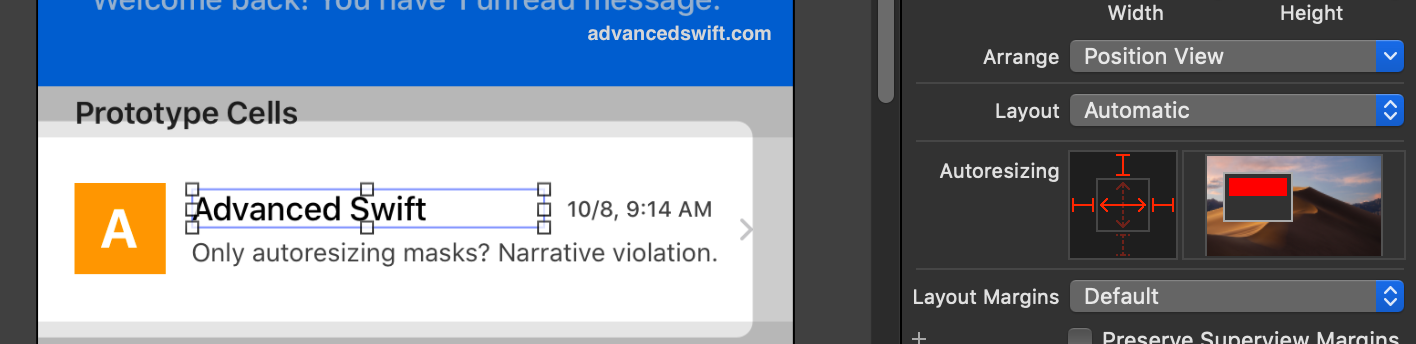
The Advanced Swift UILabel has a flexible width (shown by the red horizontal arrow) and a fixed leading, top, and trailing margin (shown by the red left, top, and right struts).
The date UILabel is pinned to the top and trailing edge of the superview, meaning the date UILabel will retain its frame and distance from the top and trailing edge.

The message UILabel has a flexible width and a fixed leading, top, and trailing margin.

The A UILabel is pinned to the top and leading edge of the superview, meaning the A UILabel will retain its frame and distance from the top and leading edge.

Now, with all views configured with the appropriate autoresizing mask, the view is responsive. In a landscape orientation the Advanced Swift and message UILabel labels will be stretched horizontally, with all other views staying the same size. The date UILabel will maintain its distance from the superview’s trailing edge.

Autolayout vs AutoresizingMask
When To Use Autolayout
Although both Autolayout and autoresizing masks can be used to layout iOS and macOS UI, Autolayout is a more powerful layout framework. Use autolayout for:
- Safe areas and margins
- Complex layout responsiveness
- Inter-view dependencies like aspect ratios, related widths
- Fine-grained layout control
When To Use Autoresizing Masks
Even though autolayout is more powerful, autoresizing can still be valuable. Consider using autoresizing masks for:
- Embedded views that primarily stretch in one direction
- Prototyping responsive UI
- Simple layouts
Using Autolayout And Autoresizing Masks At The Same Time
Autolayout and autoresizing masks are not exclusive user interface layout methods, and both can be used at the same time.
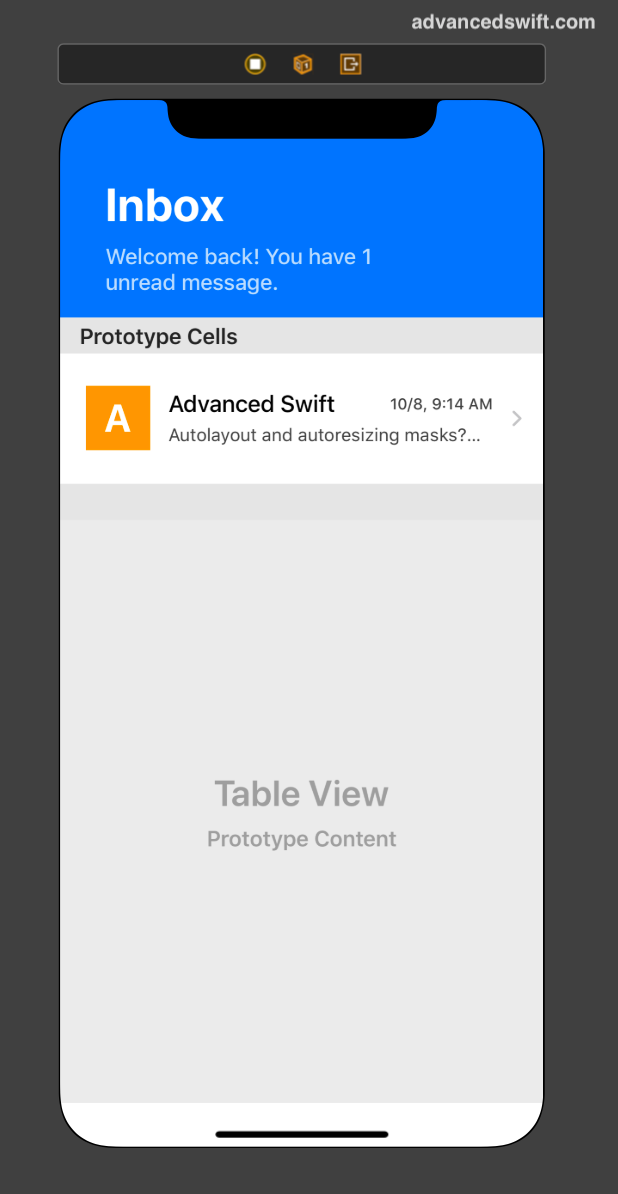
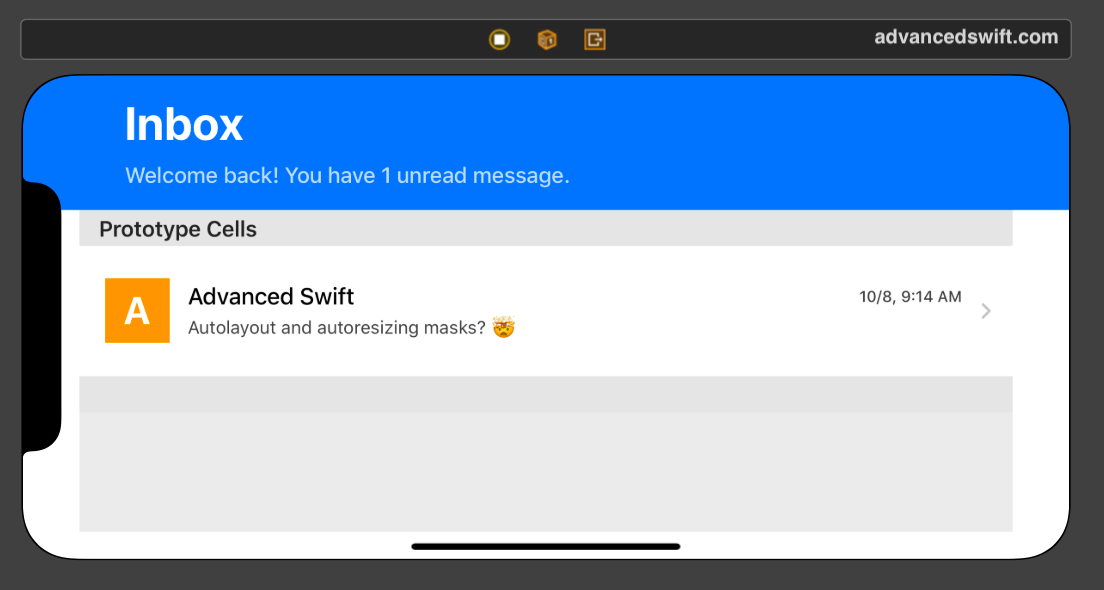
Both examples presented in this post are combined in the following example. First, a UITableView was added using autolayout constraining the top, leading, trailing, and bottom edges. Then, the UITableViewCell was added using autoresizing masks as presented in this post.
The result is a user interface layout that reacts as expected in both portrait and landscape orientations, for devices with and without rounded corners:
A Guide To Autolayout and Autoresizing Masks In Swift
That’s it! By using autolayout and autoresizing masks, individually or together, you can create response UIs for your iOS and macOS apps in Swift.